
I would like to share my experience with the new Udacity Self driving car Nanodegree. I am very excited about this technology due to my work experience in Process Control. There are similarities in engineering concepts but the control objective, sensors and final elements are very different for this technology. My end goal is to learn this technology and use it to work on potential innovations in the industry I work for (Oil and Gas).
Choosing to take this course was difficult. First the cost is high for Indian standards, second have to go through a selection process and third it is nine months long. I got a seat in the December 2016 Cohort which gave me some time to prepare the basics (Python, Github, Machine Learning, etc..)
The feeling I had when the course started was very different from other online courses. I got very excited like going to university again. I was very nervous as well. Though I was very familiar with algorithms, I never worked on image processing. The course started with Computer vision including a project in the very first week. I used the weekend to complete the project with full support form my family. It was a wonderful experience with a sense of achievement. I felt like tuning my very first PID controller. The support from the community (Whatsapp, Facebook, Slack, Udacity Mentor) helped get the confidence and support to complete the project.
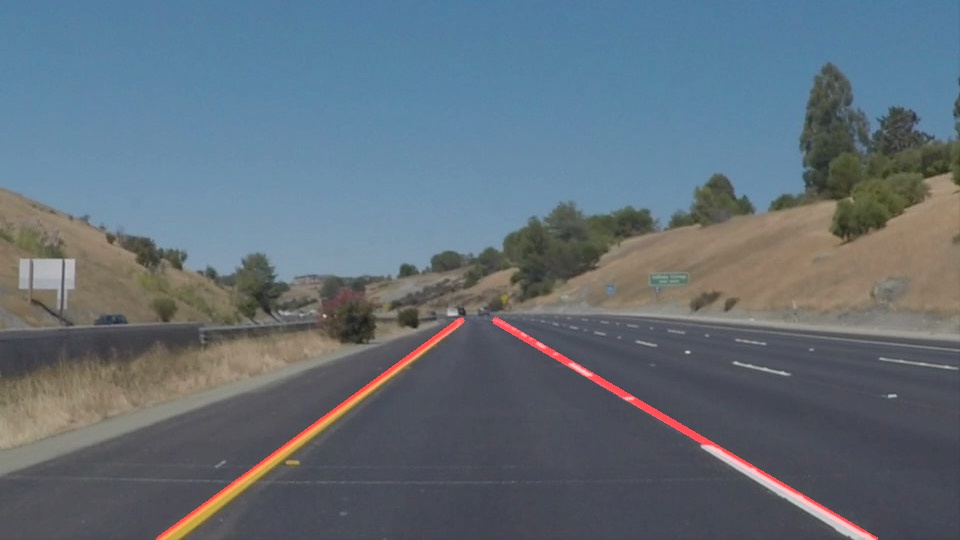
Finding Lanes Project
The code is available on Github (https://github.com/shankarananth/CarND-LaneLines-P1)
I used the following sequence of steps to arrive at the solution
1) Grayscale Image

2) Guassian Blur

3) Canny Edge Detection

4) Region of Interest

5) Hough Transformation and Extrapolation


Some lessons learnt from experience
1) I used Anaconda on windows. Had some difficulty in installing ffmpeg. I used the guideline provided in the following link to solve the issue https://github.com/adaptlearning/adapt_authoring/wiki/Installing-FFmpeg
2) I used a debug folder to save all intermediate image. This helped me a lot in easy tuning of various parameters.
3) I did not attempt the Optional challenge to optimize available time with me. Test runs with current code was not successful.
4) In terms of improvement I could further smooth the lines across frames in video.
5) I did not have experience with Jupyter. It is very different for a coding environment. However after using it I could visibly see the advantage of such an environment.
6) Line Extrapolation – I used y=mx+c draw the extrapolated line (First identify slope with co-ordinates ((y2-y1)/(x2-x1)), Second calculate C and Third identify new co-ordinates based on given y-axis) (Note: I received feedback from reviewer that it is possible to achieve the results without the need for extrapolation just by tuning Hough Transform parameters)
Results of the program uploaded to Youtube
Leave a Reply